¶ Location
Dungeons are located in different places. Each continent has its own specific locations. For the first dungeons in Mainland and Nefrah, they can be easily found by the text 'Dungeons/Hunting Grounds' located in both cities. As you travel through different continents, you will also encounter different dungeons.


Once you reach the dungeon lobby, you will encounter different statues. They will be your means of interacting with the Dungeon.
Each of them has a minimum might requirement to enter. The higher the might requirement, the stronger and more durable the monsters inside that dungeon will be.
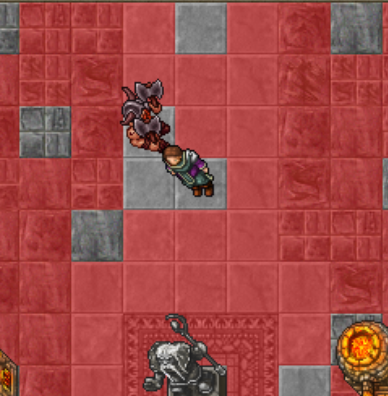
To enter the dungeon, simply right-click on the statue found in the room where you are now, as shown in the image below.
If you do not have the required might to enter that dungeon, you will be notified and prevented from entering.
¶ Dungeon Options

Before entering, given that you have enough might, when you right-click on the desired dungeon statue, a window will appear, as shown in the image on the left.
You can choose whether to complete it alone or in a group, but keep in mind that the difficulty will increase when doing it in a group, so be careful. In this menu, you can see the increase in health, damage, and experience of the creatures inside the dungeon.
You can also check the required level, the required might, and the maximum number of people (when selecting group). You may choose the scaling option, which will further increase the health, damage, and experience of the creatures, as well as the final reward, every 50 levels. There is also an option to not consume charges if you want to farm milestones.
Now, as you prepare to advance, you have the option to speed up your progress even further. By clicking on the 'Double Charge' checkbox before starting, you will consume two charges at once, doubling the benefits received.
This means you will earn double rewards, experience, and progress without having to repeat the same step twice. However, keep in mind that charges will be spent faster, so use this option strategically to maximize your gains!
¶ Dungeon Mechanics

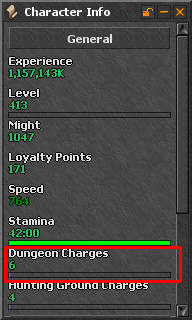
To enter a dungeon, you need to have a dungeon charge. A dungeon charge is passively generated for your character every 8 hours, whether online or offline. You can also buy and/or craft charges at specific NPCs and crafting stations. You can see how many charges you have by checking the character information panel.
Upon entering the dungeon, you will need to accomplish two things: complete the objectives and defeat the boss.
Note: dying inside a dungeon results in a normal death penalty.
Note 2: you have a limited time to complete the dungeon. Failing to do so will expel you, regardless of your progress.
First Phase

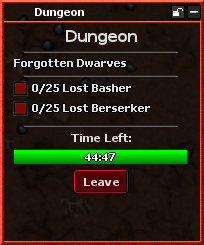
The first phase involves killing a certain number of creatures that will appear as a small window on your screen, as shown in the image on the left.
After completing the objectives, you will be able to enter the boss room, which is always located at the end of the dungeon. You do not need to go to the boss room immediately after completing the objectives, but access to the boss room is only possible once the objectives are completed.
Second Phase

The second phase involves defeating the boss. The boss has dangerous spells that you may want to avoid, as they deal high damage, potentially even killing you with a single spell.
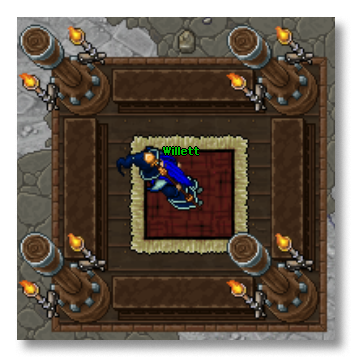
After killing the boss, you will be rewarded with several dungeon boxes, which can contain a variety of items to help you become stronger, such as upgrade crystals, spell crystals, and more. You will also be rewarded with dungeon points, which can be exchanged at Willet and other dungeon shops for various goods.

¶ Secret Dungeons
In addition to the regular dungeons usually found near cities, there are secret dungeons throughout BlackTalon. You can find them in almost any location, including quests, normal monster spawns, etc. These dungeons are different and require a specific key to enter. They can provide better rewards since the keys are not available like regular dungeon charges, so keep an eye out.
¶ Dungeons INFO
¶ Mainland Dungeons

Thorin |

Lost Basher 
Lost Berserker |
1 
Mercenary Bag 
(50%) 2 
|

Gabiru |

Lizard Dragon Priest 
Lizard Sentinel |
1-2 
Metal Bag 
(35%) 5 
|

Doctor Perhaps |

Mad Mage 
Energized Raging Mage |
2-3 
Blue Bag 
(30%) 9 
|
¶ Nefrah Dungeons

Morguthis |

Gilded Mummy 
Ancient Mummy |
2-5 
Aragorn Bag 
(7%) 10 
|

Mephisto |

Hells Core Warrior 
Hells Core Mage |
4-6 
Aragorn Bag 
(13%) 12 
|
¶ High Desert Dungeons

Stone Rhino |

Clomp 
Boar |
4-7 
Aragorn Bag 
(15%) 8 
|

Lord Of The Horror |

Darkfire Devourer |
4-7 
Lion Bag 
(5%) 9 
|

Malofur Malgrinder |

Ogre Rowdy 
Ogre Sage |
5-7 
Lion Bag 
(8%) 10 
|

Fugo |

Purple Haze |
6-8 
Lion Bag 
(12%) 10 
|
¶ Dark Island Dungeons

Tremendous Tyrant |

Cave Chimera |
6-8 
Soul Bag 
(2%) 8 
|

Wingless Pterodactyl |

Mantosaurus |
6-7 
Soul Bag 
(4%) 8 
|
¶ Icescar Lower Dungeons

The False God |

Thundergiant |
11-14 
Magic Bag 
(2%) 10-11 
|

Night King |

Skullfrost |
13-15 
Magical Bag 
(3%) 12-14 
|
¶ Icescar Higher Dungeons

Misguided Shadow |

Nightdweller |
14-16 
Iceforged Bag 
(3%) 12-14 
|

Zathroth |

Zathroth Guardian |
15-17 
Iceforged Bag 
(4%) 13-14 
|
¶ Wasteland Dungeons

Tar Razhka |

Shaper Matriarch |
16-18 
Beholder Bag 
(2%) 13-14 
|

Ayana the Crimson Curse |

Werecrocodiles |
16-19 
Beholder Bag 
(3%) 14-15 
|
¶ Skyrealm Dungeons

Sargeant Bullsteel |

Horned Heavy Knight |
16-17 
Heavenly Bag 
(2%) 14-15 
|

Lucius Shadowbane |

Spectral Paladin |
17-20 
Heavenly Bag 
(2%) 14-15 
|

Sugar Boss |

Sugar Worker |
17-20 
Heavenly Bag 
(2%) 14-15 
|
¶ Secret Dungeons

Banor |

Banor Servant |
4-5 
Blue Bag 
(30%) 15 
|

King Tutankhamun |

Thalas |
5-6 
Aragorn Bag 
(20%) 20 
|

Captain Jack Sparrow |

Pirate Cutthroat |
6-7 
Lion Bag 
(15%) 20 
|

Teether |

Biting Book |
7-9 
Lion Bag 
(25%) 20 
|

The Great Schnitzel |

Glooth Horror |
7-9 
Soul Bag 
(5%) 20 
|

Grand Master Oberon |

Falcon Knight |
23-25 
Magic Bag 
(10%) 33-35 
|

Rimuru |

Marin |
26-28 
Iceforged Bag 
(10%) 33-35 
|

Hotheaded Monolith |

Wandering Pillar |
30-32 
Beholder Bag 
(5%) 35-37 
|

Gaia |

Terrasteel Elemental |
30-32 
Heavenly Bag 
(2%) 35-37 
|